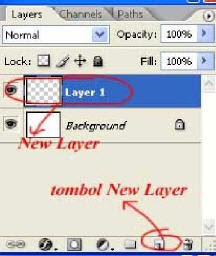
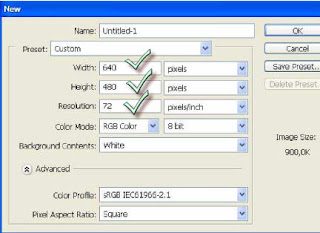
1. Open new files, and content of the image set as below
![](https://blogger.googleusercontent.com/img/b/R29vZ2xl/AVvXsEi4c78inJO6Fn08E1YvEFyHfRl2UVbLBOIwn7GFCZkU4HB2vhwOWxANt3VAv-IxZmnV1GieYFTqn3mWLOCBLpupZCTNx5dSxnaqEzZu2lmef7S5AQzWMqe3DQPmaWpki-HsBWyTyiFP8hte/s320/Gradient.jpg)
2. Then make a box with rectangular marquee tool (M on the Shortcut keyboard), click on the layer (new> layer) or the NEW layer in the layer palette.
![](https://blogger.googleusercontent.com/img/b/R29vZ2xl/AVvXsEjnvh9-VoJCchc5BJH-AdvHk5dz0fLCDHe6euLsf-abUZElStikSLyQ9w2DXZ2-gzQmzAFVWH1TeV0maT82ILQzvcM6IZEzMbftJYEuZY4H5XxSmCWgw7ZN6l6NJjNBJbVBQ0Oo6iBHovw2/s320/Gradient2.jpg)
![](https://blogger.googleusercontent.com/img/b/R29vZ2xl/AVvXsEhcqOUrdofGlZfOJY7Op63vla3jXEkZ6GRVMiR9-q9q7mtKTou5Sii_d-BChQi54fD-GJN6lbMxZBQViRGUjf-_rMSSxDdzhLtt9w8pZSgkbzej8VztaBc3Kly5yqqH3j0pkUKPy64MRwRo/s320/Gradient3.jpg)
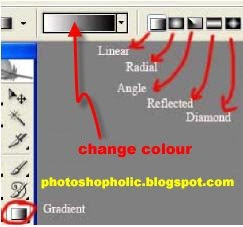
3. Selection on the layer 1,. select the gradient tool in the toolbox, select the linear gradient tool option bar
![](https://blogger.googleusercontent.com/img/b/R29vZ2xl/AVvXsEhLFURMz5KNAAUOW1aWJVdidYFb-eT0a25htrrb-3Br8-D-VSURfOwFhylzfl9VwBS1iipruNYym7IcK9ZfsF2ZnXBPGV7V0OgPtyVqAtpvcmt7jQA1fCcyk1ugDWNyUro3J8cGNIQ0Nz6q/s320/Gradient4.jpg)
![](https://blogger.googleusercontent.com/img/b/R29vZ2xl/AVvXsEiNePGBBY1FnwpH0GOT3Si2OWPCCpea8OyW-3NaVK0pgDHuPjnHoAnAm9UKJTalswSxB80YENZ68TltcqnLQmzsWAhtpdMh1CRHywI3Ps9l6_UayummGy7yVq-jNGJyImYhPmheT-YS0E3I/s320/Gradient5.jpg)
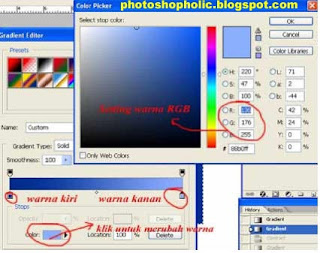
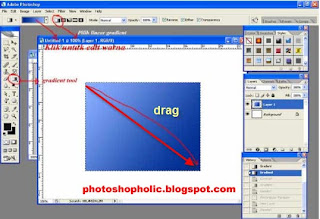
5. Being the color gradient
left: R: 0 G: 47 B: 140
right: R: 136 G: 176 B: 255
Click the reserve option in the tool bar
Click drag ago from the top left corner of selection box to the lower right corner.
![](https://blogger.googleusercontent.com/img/b/R29vZ2xl/AVvXsEgK3jyNa0CoYWPMEGX23AFPMbMH5DDql6iHBaNeBU-YPjMbjMh_bwAhiZk-E5MZ-1bOii0zvkfDvIVIxs0r7107UGyAnyq0EbI_LDTSwf0l0cYOdvAjWjIVVJRKfOl54wbe_c32eQNTuIhy/s320/Gradient6.jpg)
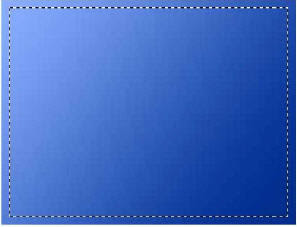
6. While the results seem to be like this
![](https://blogger.googleusercontent.com/img/b/R29vZ2xl/AVvXsEjvHIn-trsVjW4lOtzC97kS3EA0DqiMwFZSfNlFKj7IFjvT4xBgcaI7cXZ7kT7QsMCD3HXFvaEPRGAeBw37aAGauKIkbDdhmfMCEF47msbpsbu_YP9E5S39AO4PtVRPMoI-IqvBgz9GK2NF/s320/Gradient7.jpg)
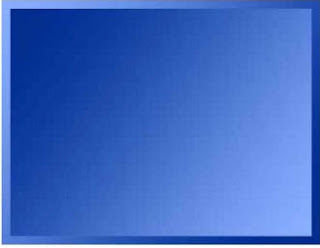
3. With the box still selected, click Select (modify -> contract.)
Fill contract value to 10 px.
then click the gradient tool. With the same color right corner click down and drag the top left corner.
press ctrl + D to remove the selection.
![](https://blogger.googleusercontent.com/img/b/R29vZ2xl/AVvXsEhBLY6H9yaUNgr49l29K2P2iodbKlB3uYpsZ9d7tnLQR40qA6pgLb-ZroU0Hk6hx72fMNcFhtLkAj6mBrCkGmfmos0bqNtdlFU2cDd1FiUeqPCM4j2BnxXHmxpc3zWzHZDpmFFaFjX9XqRG/s320/Gradient8.jpg)
Done ....
Creating Shadows (glass floor)
Photoshop Tools
clarify the color with Photoshop
Become advanced Photoshop
Different colors with Photoshop.
Photoshop Work Area.
Source: ilmuphotoshop.com
0 komentar:
Posting Komentar